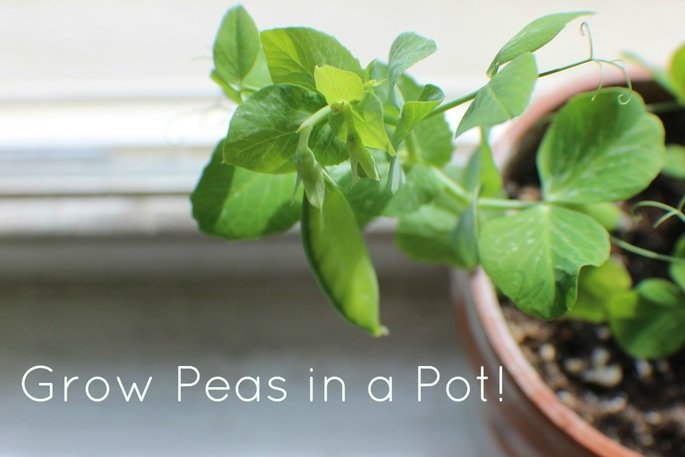
 The beginning of spring is prime time for planting peas. If you're over-eager like I am, you can start them indoors in a pot, if you choose the right variety. My favorite variety is Tom Thumb. Tom Thumb only grows to 6 inches or less, needs little to no fertilizer, and is great for containers. Plus, the peas are delicious straight off the plant! On to the tutorial! Starting your peas from seed is the best option, and I would start them in the pot they're going to produce peas in, as the roots of plants in the pea family hate to be disturbed. Plant 3-5 seeds in your pot (more if your pot is bigger, but the peas will need to be spaced 2 or more inches apart) according to the package and then keep them evenly moist until they germinate. Water regularly, but don't drown them! 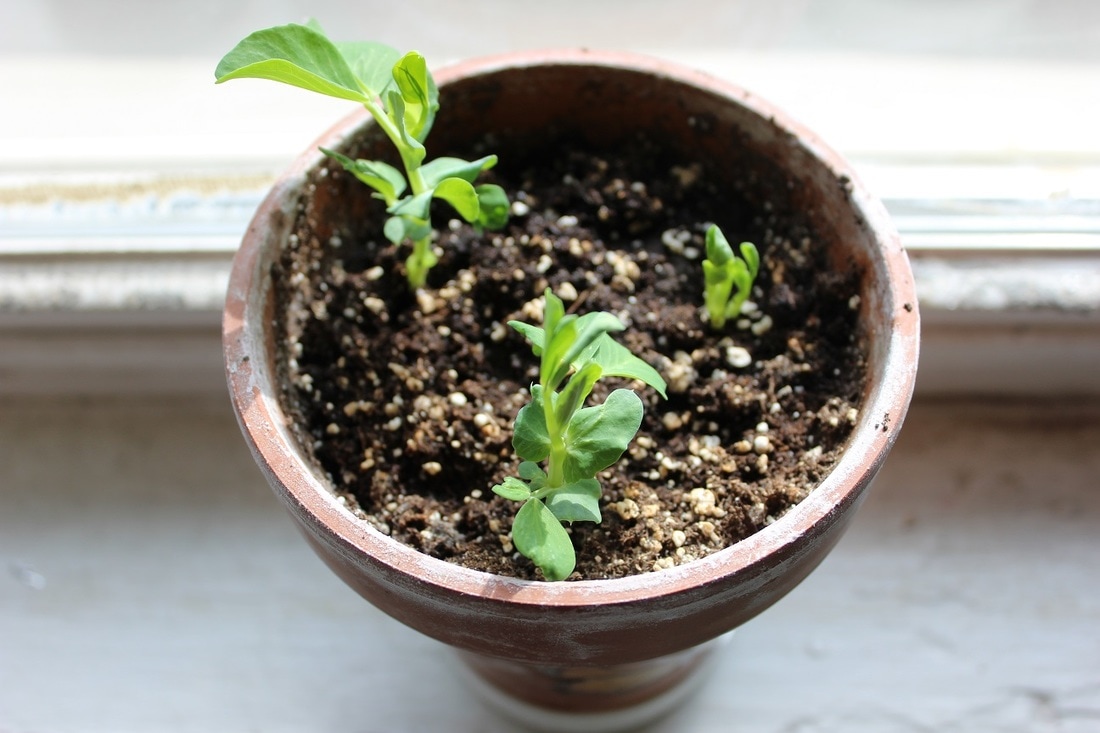 In 2-3 weeks, your plants should begin to flower, if not, feed them with a little fertilizer according to the box. (not high nitrogen. That will result in lush foliage, but no peas) The flowers are lovely, but in a few days the petals will fall off and a tiny green pea pod will push through and continue to grow. 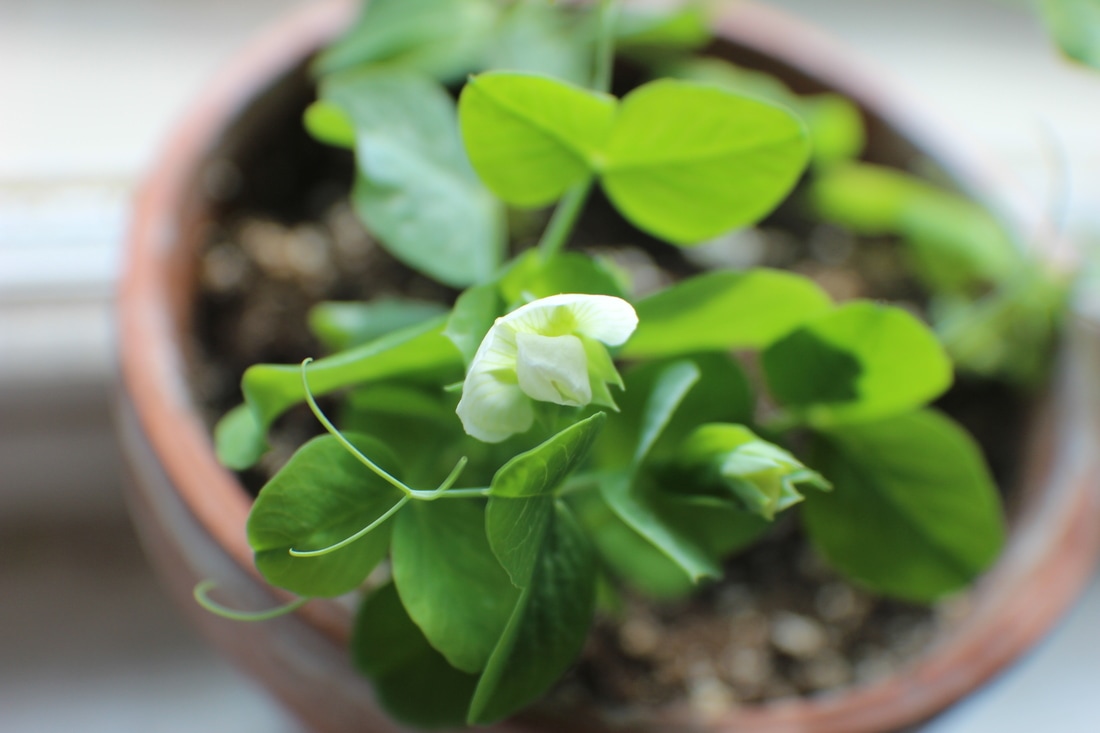 Pick your peas when they appear to be swollen. This will be around a week after they flower. Enjoy! Put your peas in salads, or eat them straight off the bush! When your plants stop flowering, and turn yellow, feed them a little bit. Happy growing! 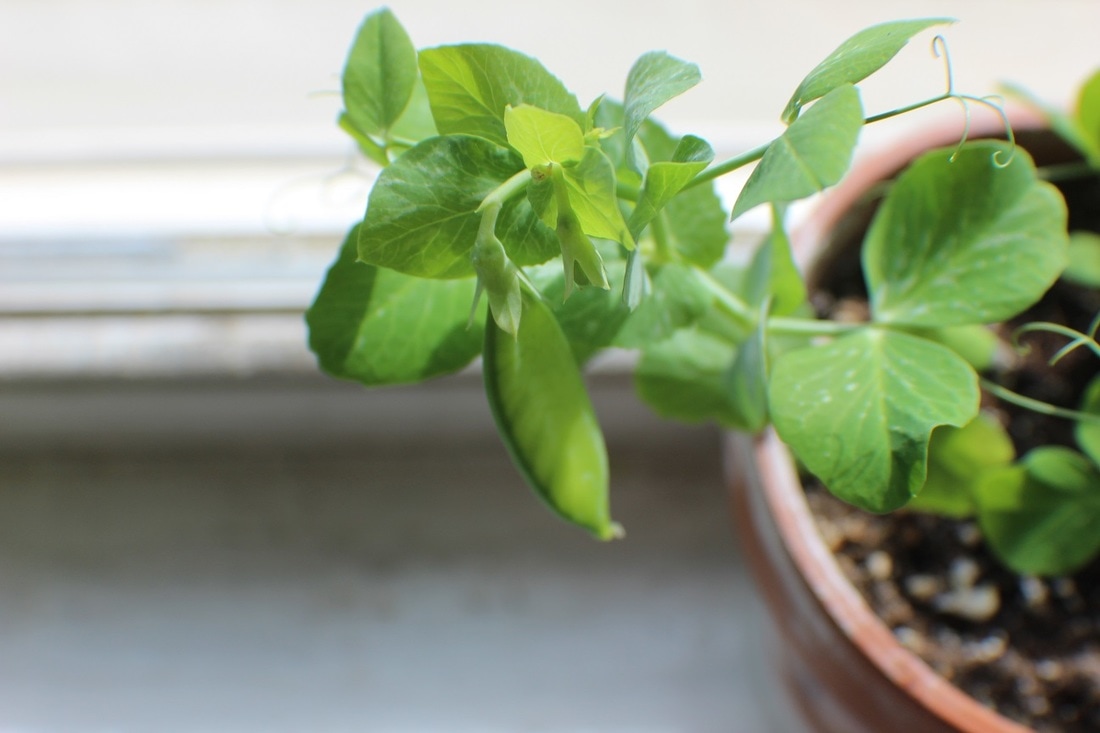
2 Comments
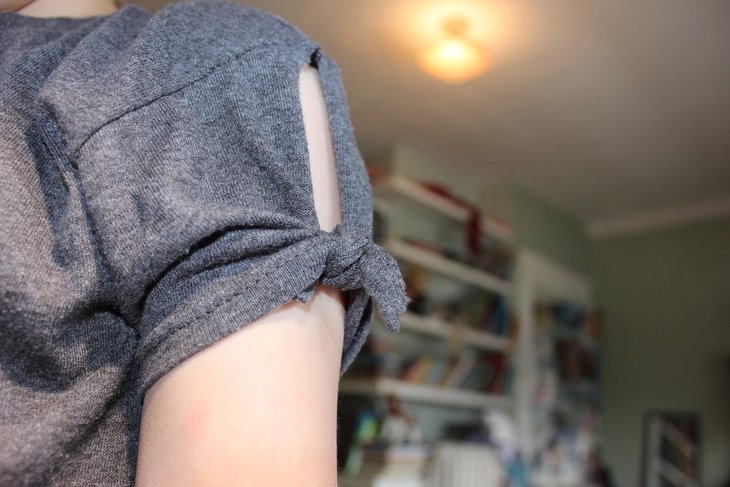 Hello, all! I'm back with a T-Shirt refashion! I love modifying t-shirts. There are so many things you can do to make a boring shirt into something cool. This one is especially easy to do. All you need are scissors and a t-shirt, and all you do is cut and tie. This shirt style reminds me of Rosie the Riveter, with the cute tied sleeves. Now on to the tutorial! First, you'll want to cut up the seam on the top of the first sleeve, stopping at the shoulder seam. Repeat for the other sleeve. 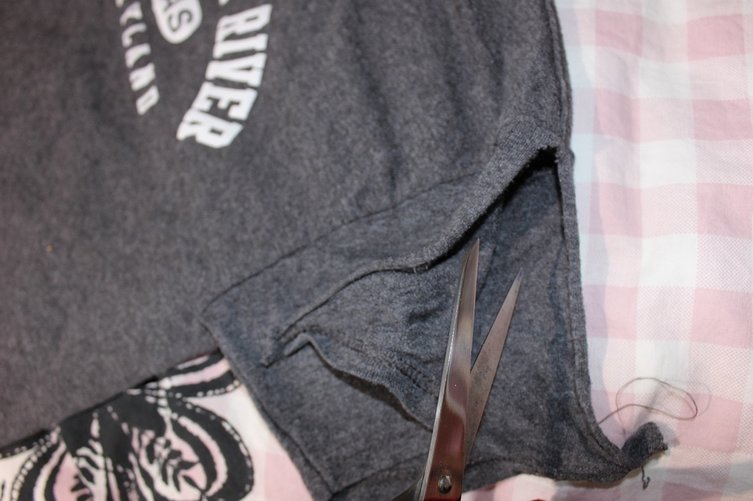 Then tie, and you're done. So cute! 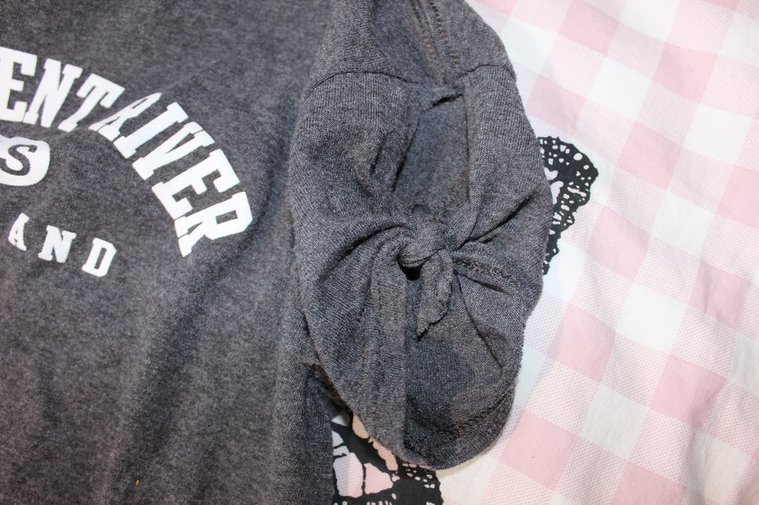 I hope this helped you! Please comment below and tell me what you think.
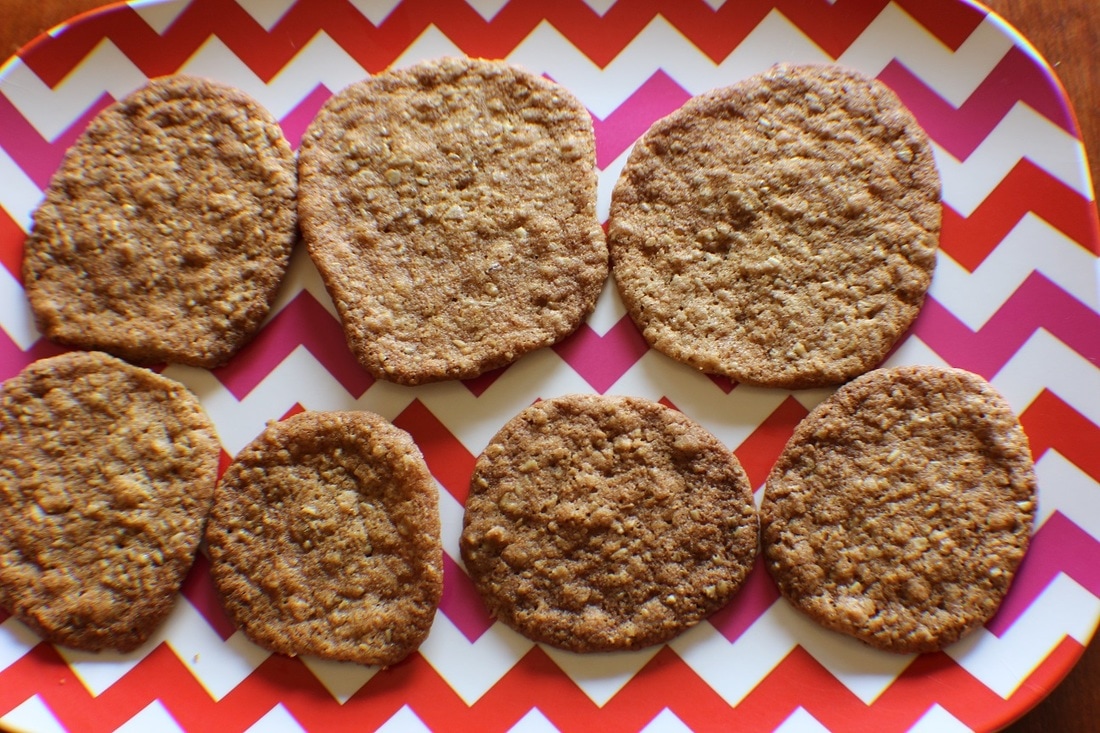 I owe you all a recipe! It's been nothing but garden projects lately, which are good, but it's time for a recipe. These are the gold coins of the cookie world. They are so yummy and golden! You can either make chewy cookies, or crispy cookies. It depends how long you bake them. This is an old classic recipe that you can change up if you want to. Try using orange extract instead of vanilla, try adding chocolate chips, or raisins, craisins, or even marshmallows! It's that type of recipe. Anyway, here goes! ingredients:1/2 a cup (1 stick) butter 1/2 cup brown sugar 1/2 cup white sugar 1 teaspoon vanilla 1 egg 2/3 cup flour 1/2 tsp baking soda 1/2 tsp salt 1 teaspoon cinnamon (optional) 1 1/2 cups oatmeal (uncooked) do it! Preheat your oven to 375 F. Cream the butter and sugars. Mix in the vanilla and the egg. Set aside. Whisk the dry ingredients (including the oats) together in a small bowl Slowly add to the butter mixture. Mix to combine. drop rounded spoonfuls on to a cookie sheet lined with parchment paper. Bake for 8-12 minutes. Let cool and Enjoy!
I've found that pictures from my trusty Canon digital camera are usually so big, 4MB or more! If I use those pictures without resizing them, they slow down my site and take forever to load! But there's an easy solution, fellow beginning bloggers! Keep reading to learn how. 1. Open paint. Paint is the tool I like to use for resizing pictures. It's super easy to use!  Next, you'll want to click on file and open. Now you can select an image that you'd like to resize. 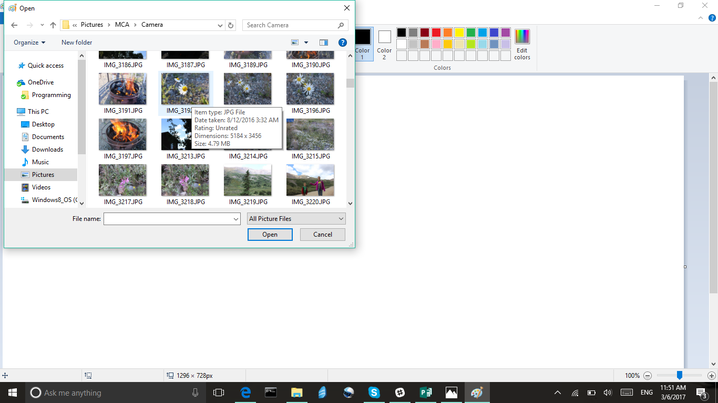 Ugh! it's so big and blurry! Don't worry, we're about to fix that... 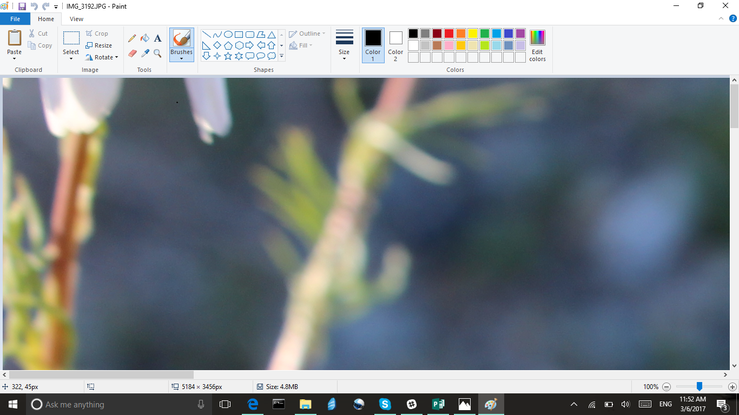 Click on the resize button. 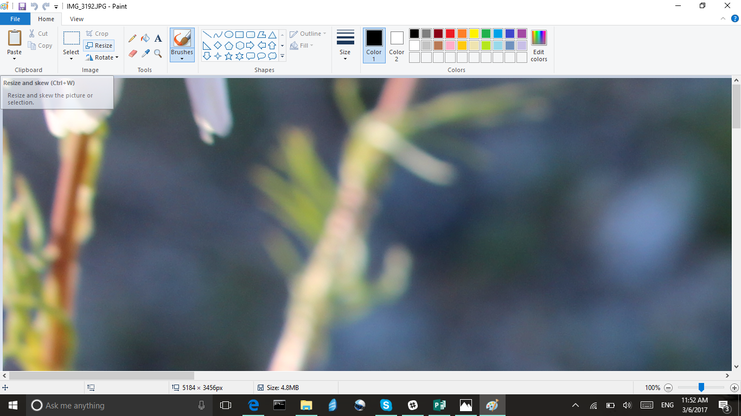 Now make sure you're resizing by percentage, not pixels, and erase the number 100 in the top text box. 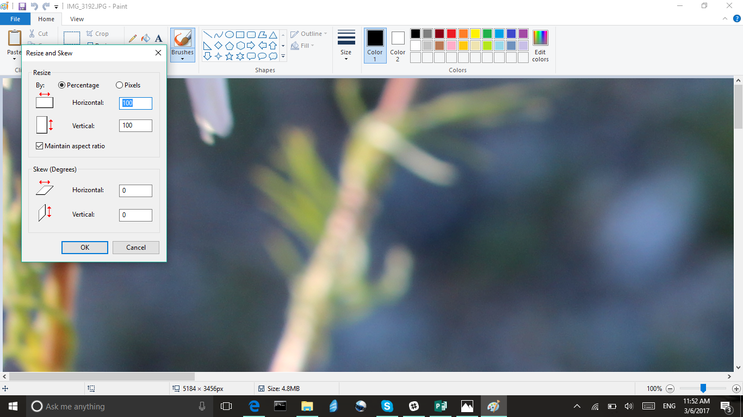 Type 25 and click OK.  Ah! Much better. Now our picture is only 234.1 KB! Save it, and use it. Good work. Now your site visitors can enjoy high-quality photos without the lag and drag! 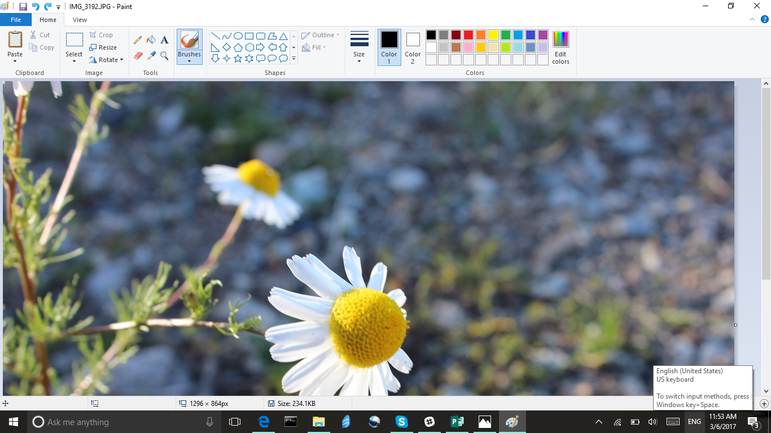 I hope this post helps you! Thanks for visiting my blog, and don't forget to subscribe to the newsletter!
I just came back from Texas where spring is in the air! Everything is blooming, including wild plum trees, daffodils, and pansies. Even a kitty seems to 'bloom' when you pet it. Here are some lovely pictures from my trip. 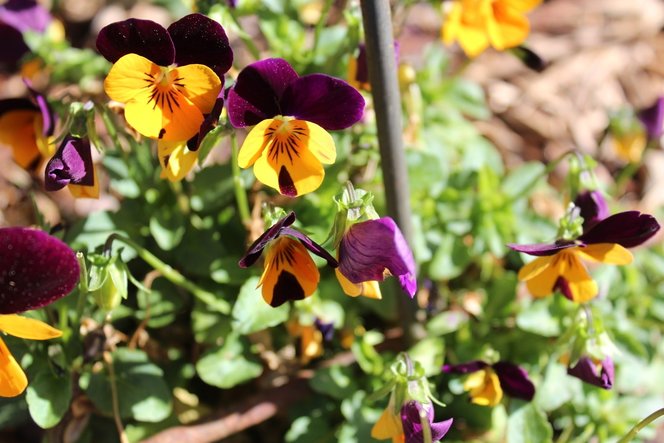 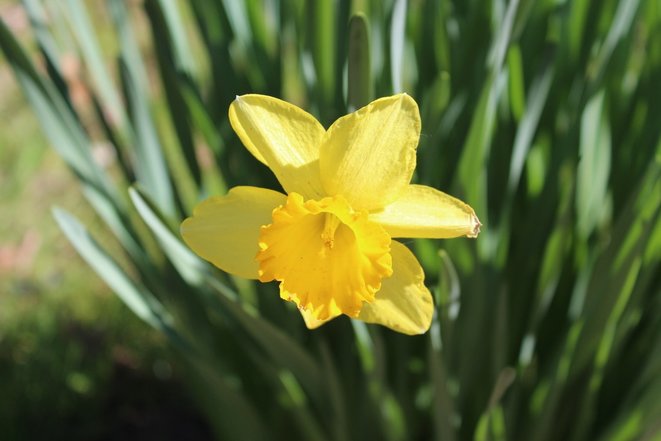 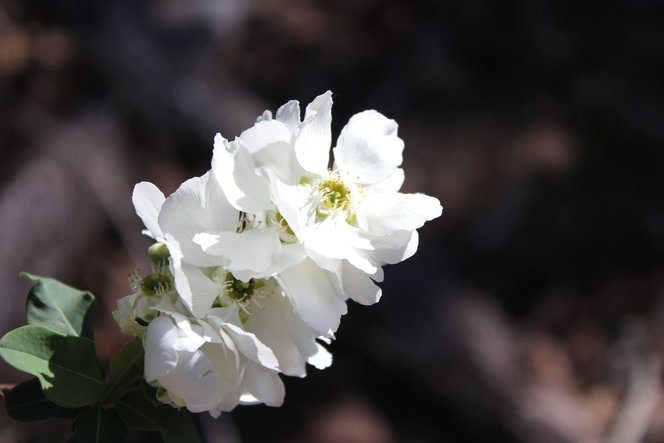 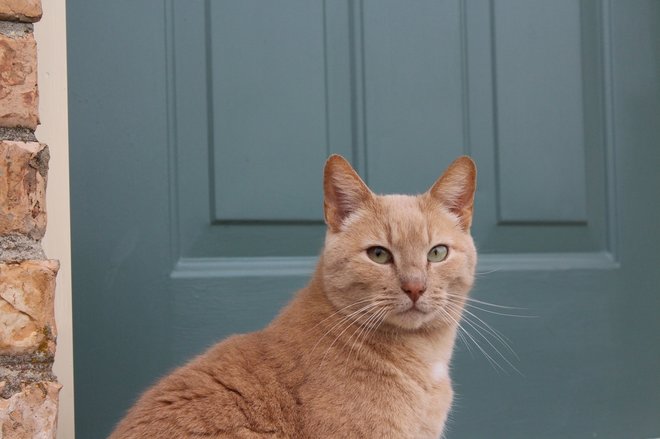 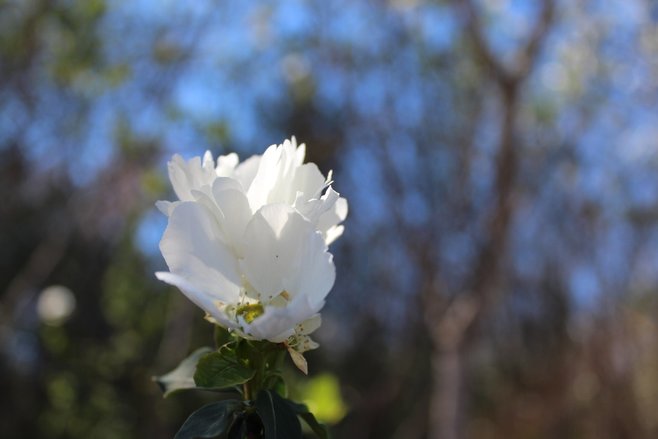 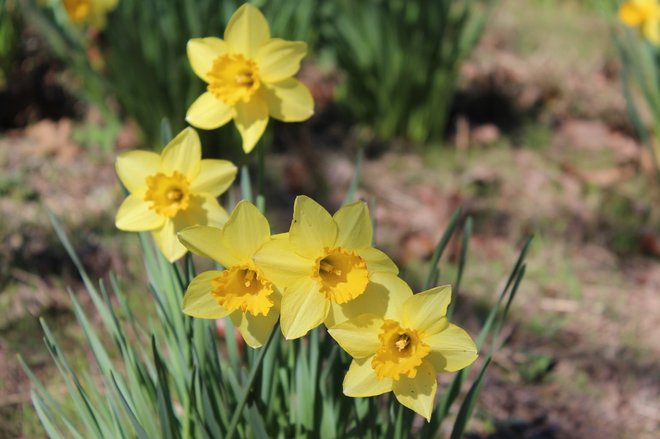 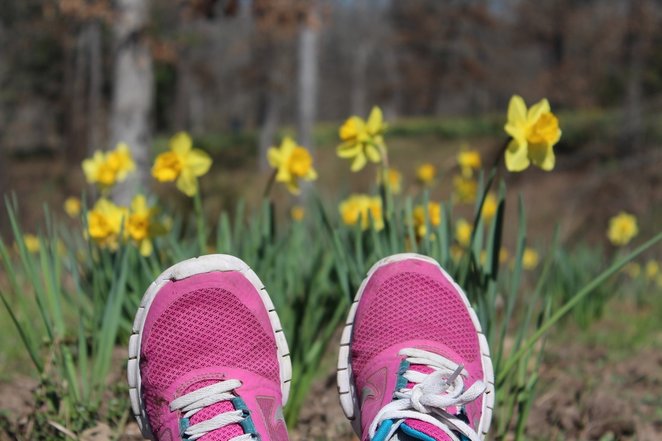  Hello, few but faithful blog readers! I just discovered a SUPER EASY hair detangler recipe that works really well for me. I thought I'd share it with you. what you need:An old spray bottle (or a new one from the travel section) Conditioner (scented or unscented) Water Essential oils (if using unscented conditioner) do it!Fill your spray bottle about 2/3 of the way full of water. Squirt in the conditioner until the bottle is a little under full. Add the essential oils if you wish. My conditioner smells so yummy, I left that out! Screw on the top and shake it up! You can use a more conditioner and less water if your hair is thick and coarse,
or if your hair is fine, use less conditioner and more water. I hope you enjoy this as much as I do! Tip: You can add a label. Mine is just duct tape and sharpie, but you could use a label sticker if you have one. I hope you all are as excited for spring gardening as I am! Last year my garden wasn't successful. I tried to have a lot of garden, and that didn't work! This year I'm starting small. Last week I went to a seed swap. Lots of people brought seeds from their plants last year, as well as old seed packets. That inspired me to have a successful crop this year, and save my seeds to share with others. Anyway, here are 2 new garden hacks that I just tried. They really work, too! Natural Seedling dipper/scooper!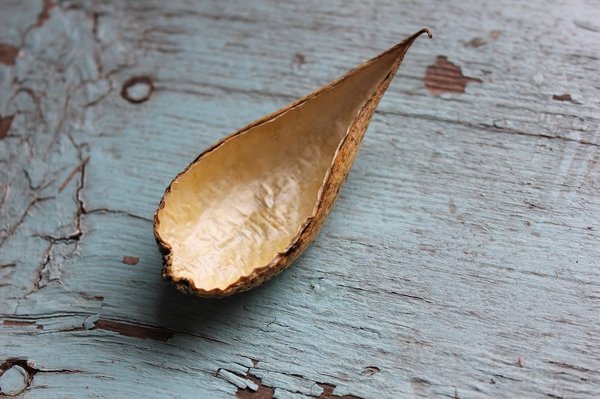 Can you guess what it is? A milkweed shell/pod! I went on a walk yesterday and found it caught in a bush, with the fluffy milkweed seeds inside. I scooped out the seeds and let them fly away in the wind. I brought it inside, and what do you know? It makes a great little dipper for watering your seedlings AND you can use it to gently scoop up a seedling to transplant it with TLC! 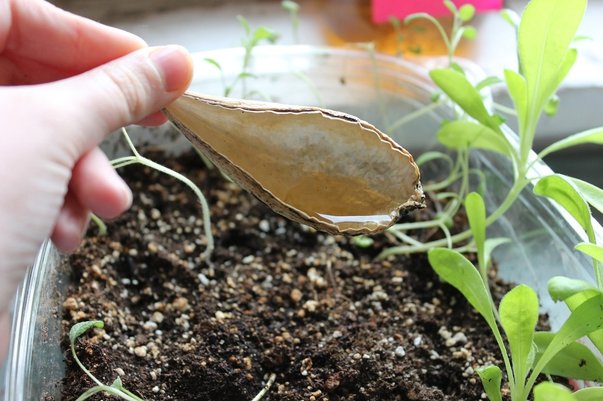 An EASY Way to Give Your Indoor/Outdoor Plants Calcium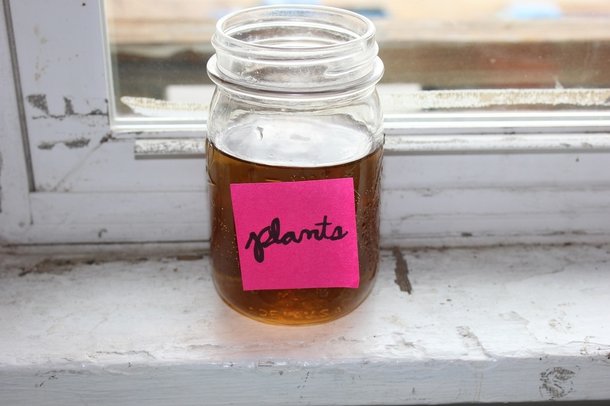 Calcium is important for plants. It makes them more disease resistant, affects the quality of their fruit, their growth and more.
It's not just important, it's essential. But how do we give our plants calcium? Some fertilizers contain calcium, it's true. But there is an easier way. Molasses! Add 1 - 1 1/2 teaspoons of molasses to every 2 cups of water you water your plants with. Your plants will thank you! 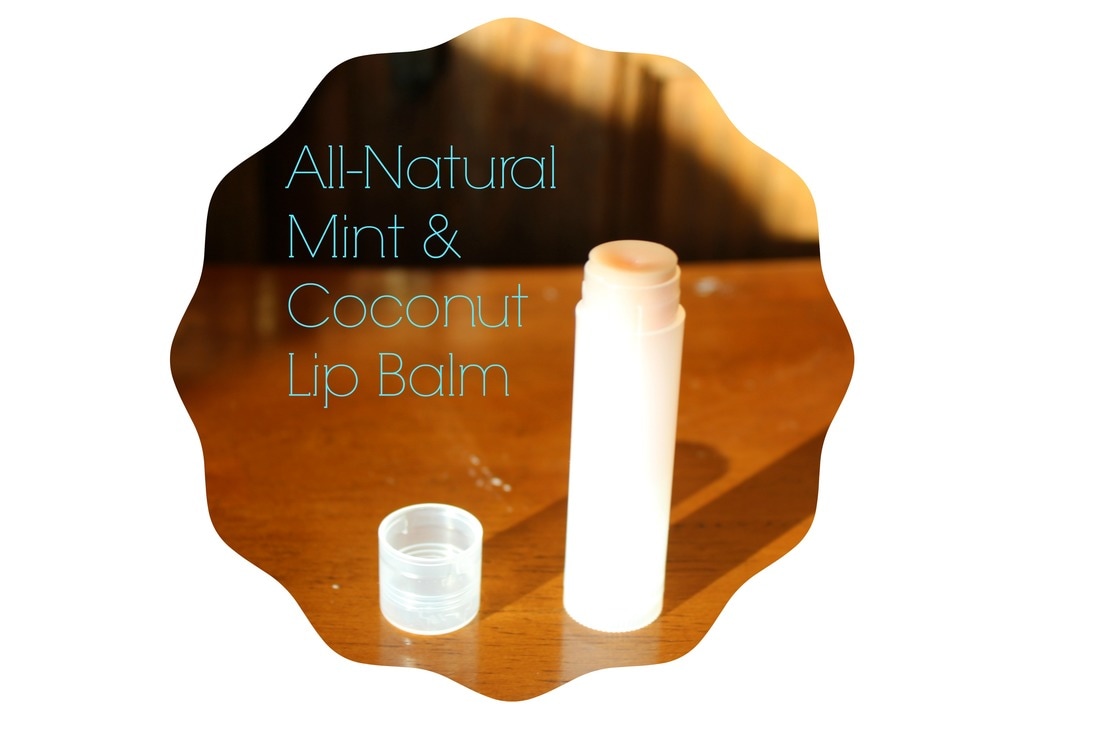 Greetings! I'm back with an amazing lip balm recipe. Making your own lip balm is almost a must in winter! The dry air dries out your lips, and it might be too icy to take a trip to the store. Icy or not, this lip balm is super easy and fun to make, Plus the ingredients are all natural! The recipe below makes 1 regular tube or pot. Ingredients: 1 tsp grated beeswax (Must be grated!) 1 1/4 tsp coconut oil 5 drops of vitamin E oil 5-7 drops of peppermint essential oil. 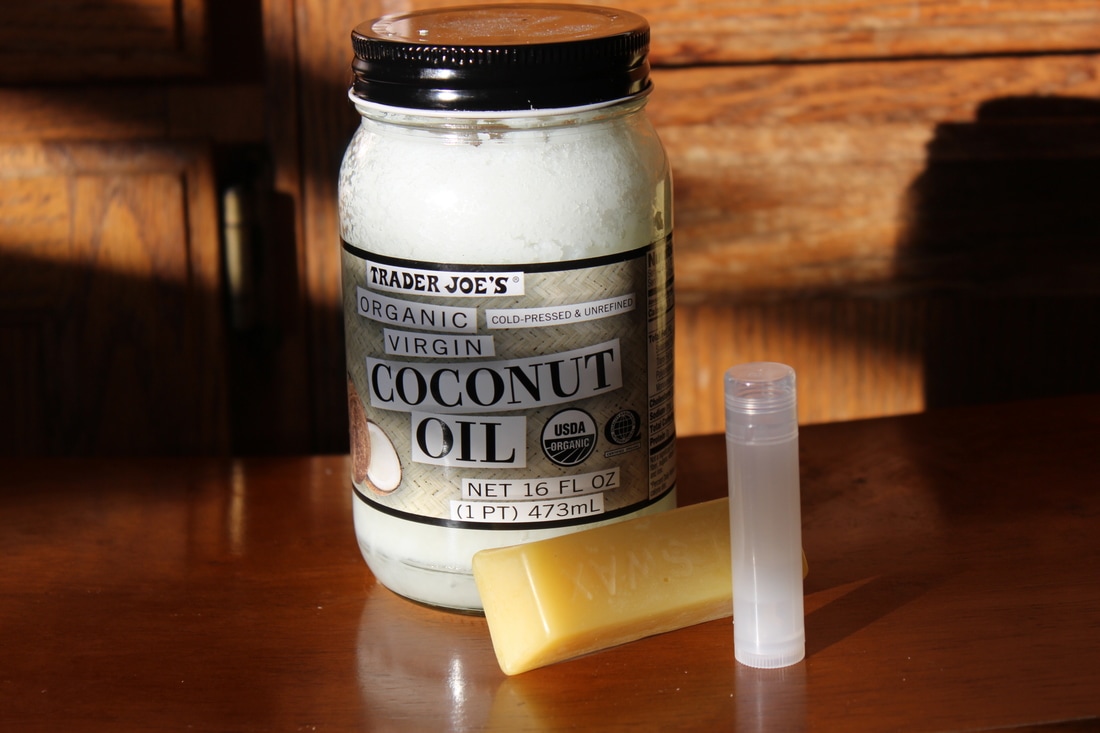 Do it!Microwave all ingredients in a pyrex measuring cup for 30 second intervals until the mixture is melted. (Tip: If there are only a few tiny pieces of beeswax in the melted mixture, just stir them with a chopstick until they melt.) Stir with a chopstick, and (carefully!) pour into your pot or tube. let harden for an hour or so before using. Your finished lip balm should be a nice creamy white color. I added a teensy bit of burt's bees red lipstick to mine for a light pink color. You can also leave out the essential oil, or use a different one, like maybe sweet orange or lavender. Happy lip balm making! -Flala
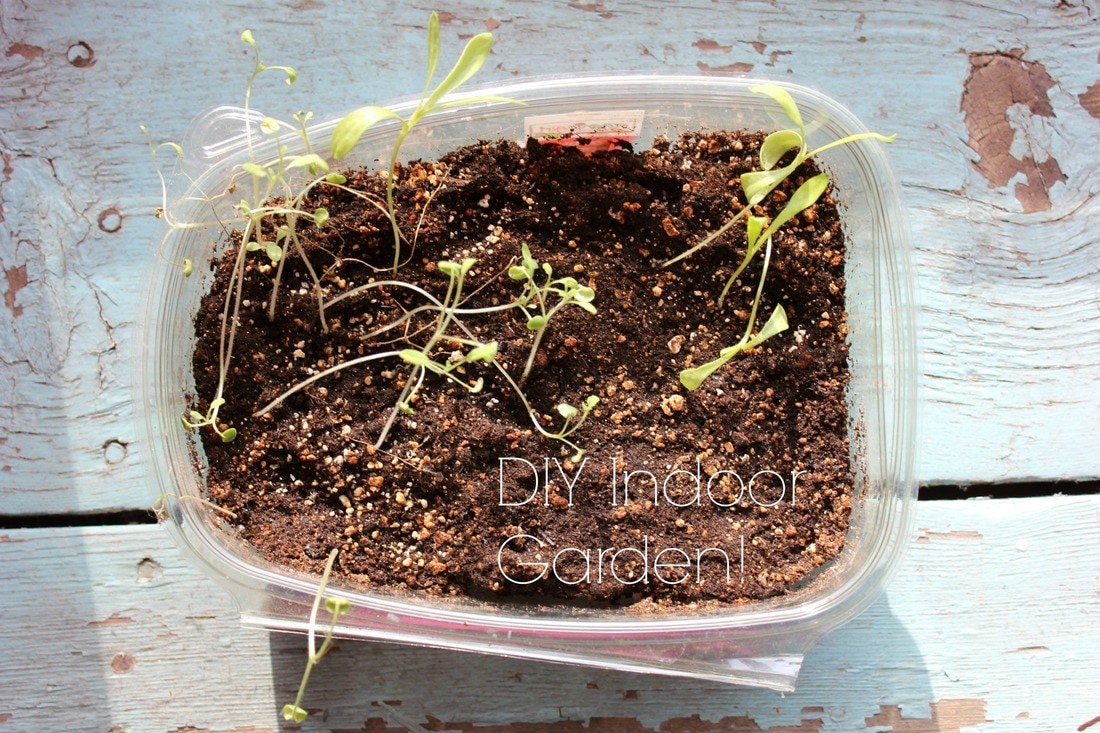 I was kinda on 'winter break', so sorry about not posting. But here is another cool DIY project you can do at home. I am ready for spring. I don't know about you, but once Christmas is over, and you get a few January snows, I get tired of winter, and I get excited for spring gardening! But why wait all the rest of dreary January, February, and most of March until the last frost? Start your garden indoors! Do it!I'm using 2 plastic salad containers, that are the same size, without lids to make my drainage system. I poked a few holes in the first container (before filling it with soil, obviously) And put a little water in the second container. Then I put the first container inside the second container and filled it with dirt. Then you can use a spray bottle filled with water, or a watering can, or whatever method you want, to moisten the soil. Then you can plant your seeds according to the packet instructions, and water from the top when the soil gets dry.
I'm growing sage on the left and marigolds on the right. I hope you have sucess with your indoor garden! -Flala Hello there! I'm starting a month-long challenge/contest because fall is beautiful! The challenge: Go for a walk and take at least 4 pictures of the things you see. Try to tell a story with the pictures! Send them to [email protected] The highest quality entry that tells the best story will be posted on this blog, and the winner will score an amazing recipe! The deadline is December 1. Look below for my story with photos!     |

Hi there!I am a homeschooler who loves to do DIY projects, make new recipes, grow plants and discuss interesting stuff. Archives
September 2018
If you like my blog, copy and paste my button to yours!

 |
